Shipping Estimate
USA
- USA
- CAN
- USA
- CAN
Ships within 48 hours · Estimated delivery Jul 12 - Jul 17
 Promo Codes Available:
For Your Every Summer RSVP, with Code: SUMMER15
Description
how big can an air plant get Get 'Tillandsia xerographica' For saleWelcome to the world of the king of air plants Tillandsia xerographica, a stunning perennial, evergreen epiphyte that's bound to leave you in awe period. It reigns supreme over all other Tillandsias! Its name is derived from the Greek words "Xero" and "graphica; which both indicate "dry writing" or "dry painting." The "king or Queen" of air plants is another name for the Xerographica air plant. These slow growing Xerographica air plants are native to
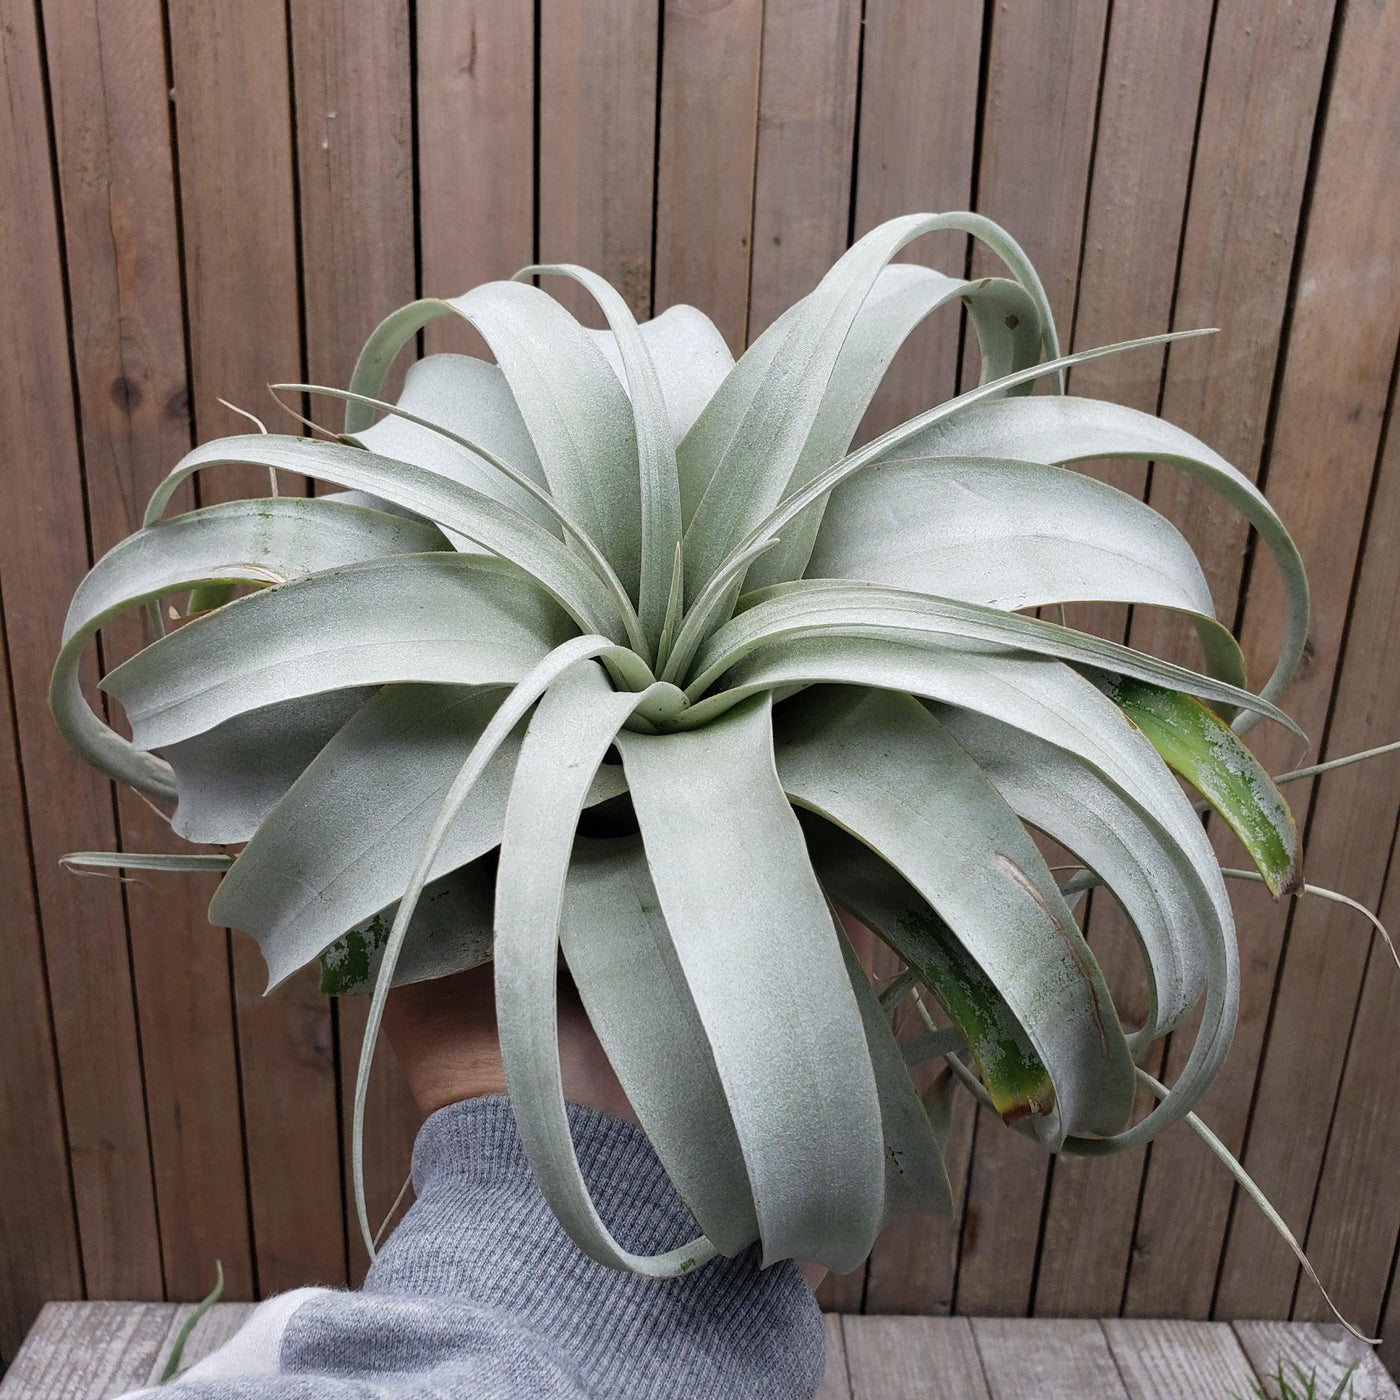
Welcome to the world of the king of air plants - Tillandsia xerographica, a stunning perennial, evergreen epiphyte that's bound to leave you in awe period. It reigns supreme over all other Tillandsias! Its name is derived from the Greek words "Xero" and "graphica”; which both indicate "dry writing" or "dry painting." The "king or Queen" of air plants is another name for the Xerographica air plant.
These slow-growing Xerographica air plants are native to Southern Mexico, El Salvador, and Guatemala, where you can find them hanging out in the topmost branches of subtropical forests. They cling to the trees and grow completely in the air, high in the forest canopy. Xeros stand out from other air plants in terms of aesthetic appeal.
As they grow, their mossy green (silvery-gray leaves) flocked lovely thick leaves wrap and spiral around one another and are also covered in trichomes, which are small scales that help the xerographica air plant absorb moisture from the air. This produces a beautiful, nearly spherical air plant that will provide you with stunning living décor that is simple to maintain because of its sluggish growth habits.
With its quite large growth of up to 3 feet in diameter with the leaves curving inward to form a tight rosette shape, as compared to other air plants, and low maintenance needs, this perennial evergreen large air plant is sure to impress and make it perfect for even the busiest gardener.
Mature and large Tillandsia Xerographica blooms between spring and summer, and it takes years to flower. A single spiky inflorescence (floral bracts) bears bisexual red to purple Tillandsia Xerographica blooms. With a magnificent spike of long-lasting purple to crimson inflorescences, the tubular flowers, and stem can reach a height of one to three feet. Only under ideal conditions do plants bloom once during their lifespan.
The typical Tillandsia Xerographica lifespan is about twenty years. Tillandsia Xerographica pups formed after the death of the flower at the base is the ideal way of their propagation from a mother plant. The Tillandsia Xerographica mini and adult plants are stunners in landscaping, balconies, and gardens. You can plant air plants in mounted displays and holders like terrariums and aeriums!
Belonging to the esteemed Bromeliaceae family of plants (the beloved bromeliad family), Tillandsia xerographica exudes an irresistible charm fit for royalty in your stunning living decor! You can get this king of air plants for sale online at Planet Desert. In this product description, we'll take you through everything you need to know about caring for this xerographic air plant - from sun exposure to hardiness zones. So, let's dive in!
Watering Needs
When it comes to watering this king of the air plants Tillandsia xerographica, it's important to strike a balance. These air plants prefer to be underwatered rather than overwatered. A good rule of thumb is to mist, soak or rinse them once or twice a week, depending on the humidity of your environment. This stunning air plant gets its moisture from the morning dew instead of traditional roots.
To water the Tillandsia xerographica, you can either mist it with water using a spray bottle or give it a thorough soak. When misting, make sure to evenly spray the leaves, allowing the water to gently coat them. If you choose to soak your air plant, you can submerge it in a deep bowl or basin of water for about 5 minutes, then let it drain by shaking excess water and dry completely before placing it back on its display. A few good shakes will drain the excess water and will help to protect it from rotting.
Additionally, rinsing is indeed a great method for watering Tillandsia xerographica air plants. Giving them a gentle rinse under running water is an effective way to hydrate them. Just make sure to thoroughly wet the leaves, allowing the water to reach all parts of the plant. After rinsing with lukewarm water, hold your healthy plant upside down and let the excess water drain off and allow the plant to dry completely before placing it back in its display. This method helps mimic the natural rainfall that these plants would receive in their native habitats.
Remember, it's important to avoid letting water sit in the center of the plant, as this can lead to rot. After watering, make sure to shake off any excess water and allow the plant to dry within a few hours. Providing proper air circulation is key to preventing any moisture buildup.
Light Requirements
When it comes to light requirements, xerographica air plants are sun-loving epiphytes that prefer bright, indirect light for at least 4-6 hours daily. These plants thrive in a spot where they can receive ample amounts of filtered sunlight throughout the day. It's best to avoid placing them in direct sunlight for prolonged periods, as it can potentially scorch their delicate leaves.
To provide the ideal lighting conditions, you can place your Tillandsia xerographica near a west-facing window with sheer curtains or window space in a location where it can receive bright light. This will help mimic the natural conditions these air plants would experience in their native habitats.
Remember to observe your air plant closely and make adjustments to its placement if you notice any signs of stress, such as leaf discoloration or wilting of the green leaves. Finding the right balance of light is essential for the health and well-being of your Tillandsia xerographica air plant.
Optimal Soil & Fertilizer Needs
When it comes to soil, Tillandsia xerographica air plants don't require soil like other plants. They are epiphytic plants, which means they naturally grow on other surfaces and absorb nutrients and moisture from the air. Instead of soil, you can mount or place your Tillandsia xerographica on a piece of driftwood, bark, or other decorative surfaces.
As for fertilizer, Tillandsia xerographica air plants have minimal nutritional needs. They can absorb nutrients directly from the air and rainfall. However, if you want to give them a little boost, you can use a specialized air plant bromeliad fertilizer or natural fertilizer with an equal mix of NPK. Apply the fertilizer sparingly, about once a year during the growing season.
Remember, air plants are adapted to survive in nutrient-poor environments, so it's crucial not to over-fertilize them. Providing them with the right mounting surface and occasional light feeding will help keep your Tillandsia xerographica air plant healthy and thriving. They also are among the easiest air plants to grow in the home.
Hardiness Zone & More
Tillandsia xerographica air plants are native to tropical regions and are typically found in USDA hardiness zones 10-11, which means they thrive in warm climates with minimum temperatures above 30°F.
In terms of temperature, for Tillandsia xerographica air plants, the ideal temperature range is between 60°F and 80°F. They can tolerate slightly higher temperatures, but it's important to avoid exposing them to extreme heat or cooler temperatures.
When it comes to humidity, these air plants prefer moderate to high humidity levels. They are adapted to tropical environments where humidity is naturally higher. To provide the optimal humidity for your Tillandsia xerographica, you can mist them with water a few times a week or place them in a humid location, such as a bathroom or near a humidifier.
By providing the appropriate hardiness zone, temperature range, and humidity levels, you can create a favorable environment for your Tillandsia xerographica air plants to thrive and grow beautifully.
Shipping Notes
- Free Standard Shipping on $100+ Orders to the USA.
- Except Preorder products are shipped in 48 hours.
- Delivery to the USA:
- Standard Shipping : 3-10 business days
- If time is of the essence, please consider selecting expedited delivery for faster service.
Exchange/Return Notes
- We offer a 30-day return/exchange service after receiving.
- Final sale items are not eligible for returns or exchanges.
- To process your return/exchange, please contact us at [email protected]
- Please click here for more details>>> Return & Exchange Policy